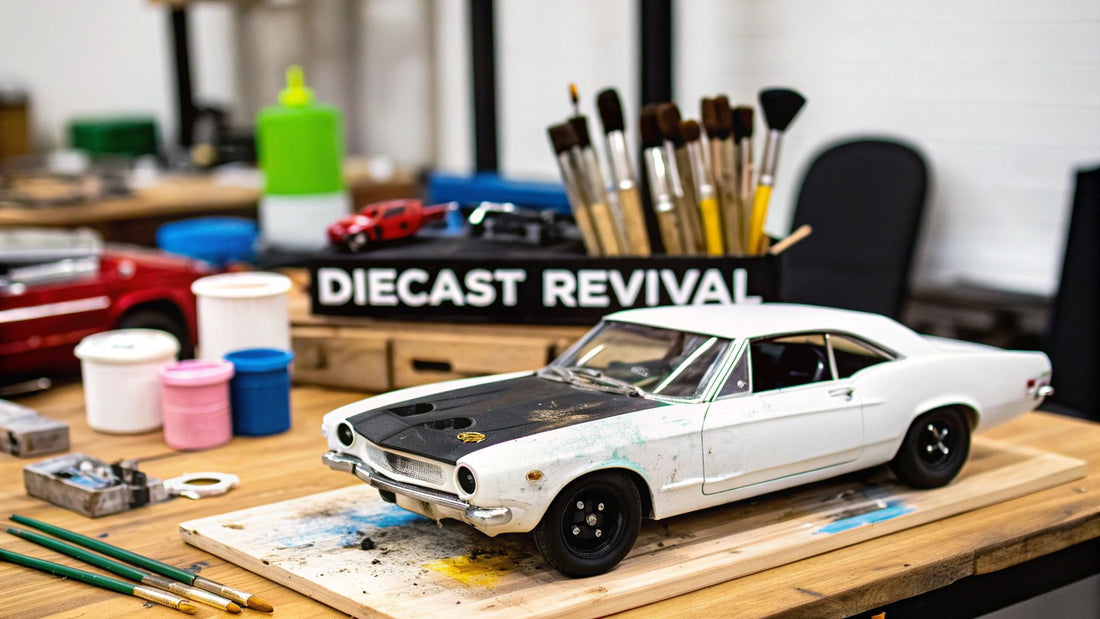
6 Advanced Diecast Restoration Tips for 2025
That cherished but time-worn diecast car sitting on your shelf holds stories, but its faded paint, chipped edges, and missing details might be hiding its true glory. While a simple cleaning can work wonders, a full restoration can transform a neglected model into a stunning centerpiece. This guide moves beyond generic advice to provide a deep dive into the specific techniques and professional secrets that separate a good restoration from a great one. These are the actionable diecast restoration tips that experienced customizers use to achieve flawless results.
Whether you're reviving a rare Corgi from your childhood or customizing a modern Hot Wheels, these six expert steps will provide you with a structured, step-by-step roadmap. We will cover everything from the crucial first stage of careful disassembly and part cataloging to the final protective clear coat, ensuring your project not only looks professional but is also preserved for years to come.
You will learn how to safely strip paint without harming the delicate metal, properly prep the surface for an even finish, and apply paint with professional-grade techniques. Furthermore, we'll explore methods for recreating tiny, intricate details and tampos, a critical step for an authentic look. Prepare your workspace, because we're about to turn that forgotten model into a masterpiece.
1. Proper Disassembly and Part Identification
The foundation of any successful diecast restoration project is not the paint, polish, or final assembly, but the meticulous care taken during disassembly. Rushing this initial stage is a common mistake that can lead to lost parts, incorrect reassembly, and damage to delicate components. A systematic approach to taking the model apart ensures that every piece is accounted for and understood, setting you up for a smooth and professional-quality restoration.
The Disassembly and Documentation Process
Before you even pick up a screwdriver or drill, pick up your camera. Creating a detailed photo log is one of the most vital diecast restoration tips you can follow. Photograph the model from every angle before you begin. As you remove each component, from the main body and chassis to the tiniest interior part, take more photos. This visual record becomes an invaluable guide during reassembly, especially for complex Corgi or Dinky Toys models with intricate mechanisms.
Once a part is removed, it needs a designated home. Simple tools can make a world of difference:
- Egg Cartons or Ice Cube Trays: These are perfect for separating screws, axles, and other small hardware. Their individual compartments prevent tiny, crucial pieces from getting lost.
- Numbered Baggies: For larger assemblies, such as an engine block or suspension system, place all related parts into a small, sealed bag and label it. This method is popular among restorers of classic models where parts are not always interchangeable.
- Removable Tape: Use small pieces of painter's tape to label similar-looking parts (e.g., "front left wheel," "rear right axle") to avoid confusion later.
This organized workflow is your project's blueprint. The following infographic illustrates the essential three-step flow for methodical disassembly.
Following this simple sequence of documenting, sorting, and identifying prevents guesswork and ensures every component is handled correctly throughout the restoration.
Identifying Your Materials
Understanding what your model is made of is just as important as knowing how it comes apart. Most diecast bodies are made from a zinc alloy called Zamak, but windows are typically plastic, tires are rubber, and chassis or accessory parts could be plastic, steel, or aluminum. Identifying these materials is crucial because different cleaning agents, paint strippers, and polishing compounds react differently with each one. For example, a chemical stripper that is safe for the Zamak body will melt plastic windows instantly. A quick, hidden scratch test can help you differentiate between metal and plastic if you are unsure. This foundational knowledge informs every subsequent step, from cleaning to final detailing. For those looking to take their projects even further, you can learn more about the possibilities of diecast customization once you master these basic principles.
2. Safe Paint Removal Without Damage
The most transformative stage of many diecast restorations is stripping away decades of chipped, faded, or damaged paint to reveal the clean metal beneath. However, this step is also where irreversible damage can occur if not approached with caution. Choosing the right paint removal method is crucial for preserving the integrity of the diecast body and preventing harm to delicate plastic or rubber components that may still be attached. A careful, methodical approach ensures a pristine surface ready for a new, factory-fresh finish.
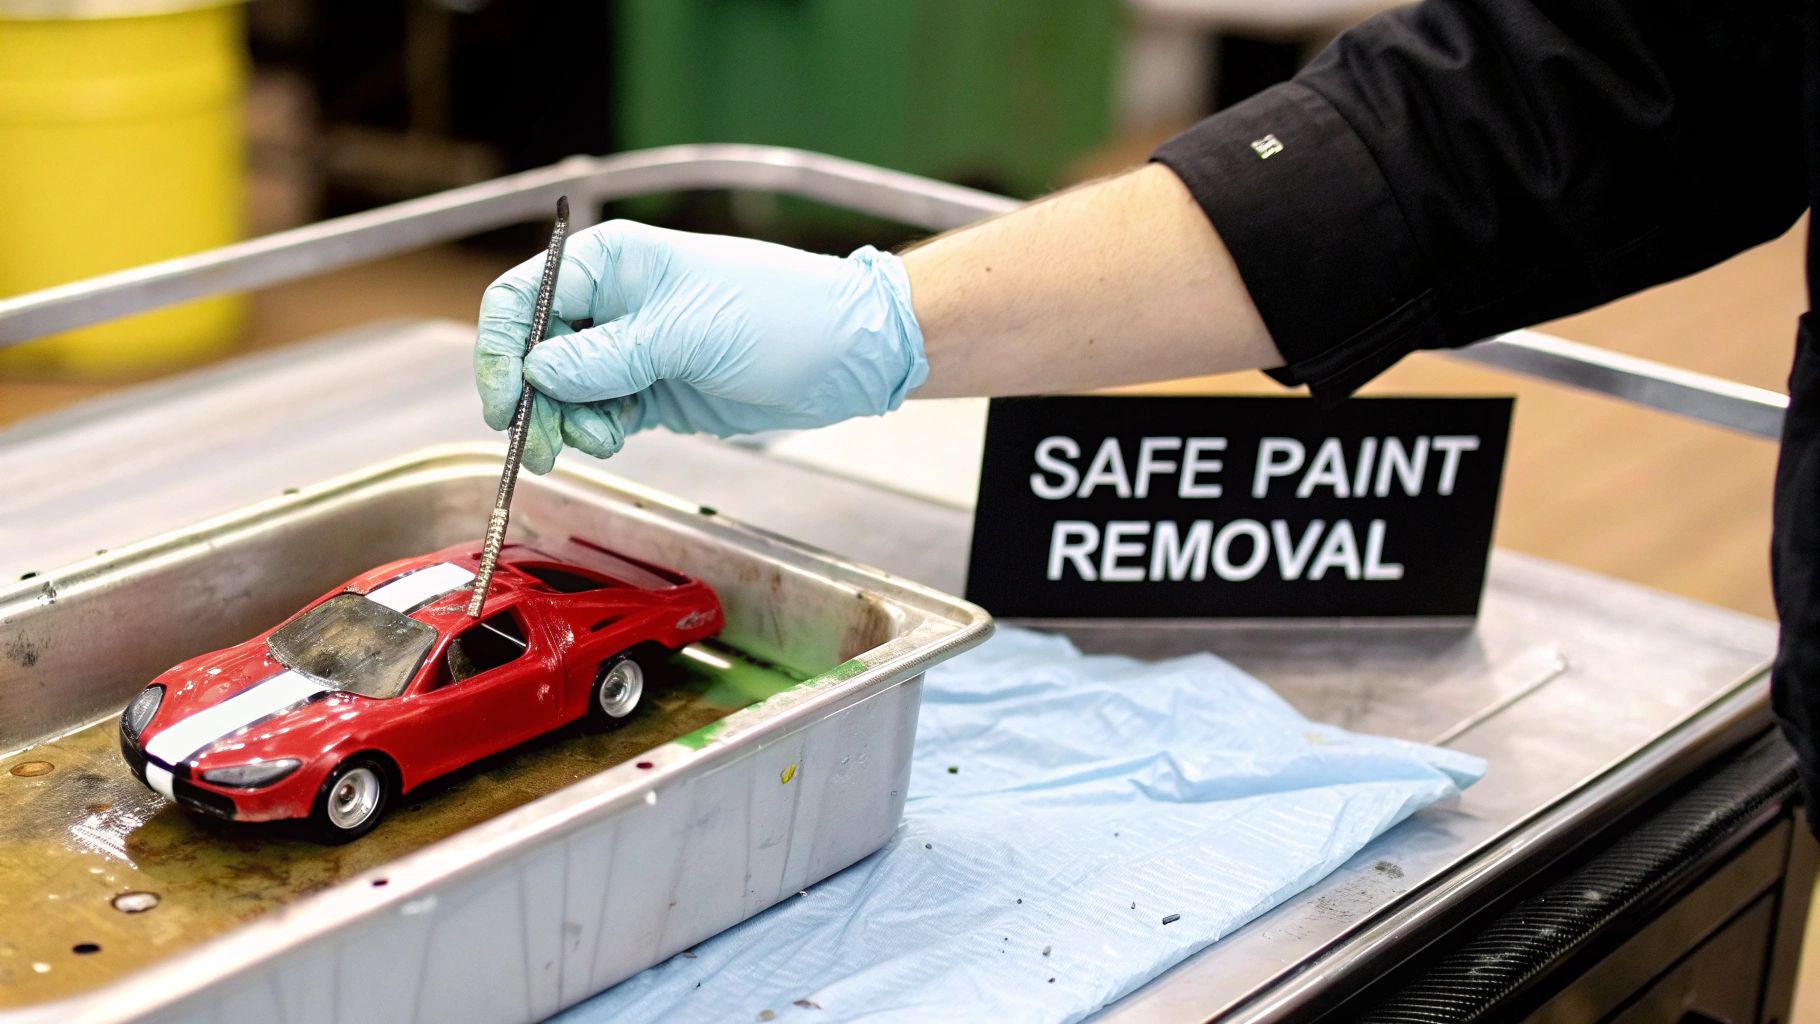
This process is one of the most satisfying parts of a project, as shown in the video below, but it demands patience and the right tools for the job.
Choosing Your Stripping Method
The ideal paint stripper depends entirely on the model's material and the type of paint you are removing. Aggressive chemical strippers are effective but can be dangerous to both you and the model if misused. Always start with the least aggressive method possible and work your way up.
- Non-Toxic Citrus Strippers: Products like Citristrip are a great starting point. They are less caustic, have fewer fumes, and are generally safer to work with, though they may require more time to dissolve tough, factory-baked enamels.
- Brake Fluid: A classic, old-school method, soaking a diecast body in a container of DOT 3 or DOT 4 brake fluid can effectively lift old paint over 24 to 48 hours. It is generally safe on Zamak but should be kept away from all plastics.
- Aircraft Stripper: For the most stubborn finishes found on vintage Matchbox or Corgi models, an aircraft-grade paint remover is extremely effective. However, it is highly corrosive, requires full personal protective equipment (gloves, goggles, respirator), and will destroy plastic on contact.
For a comprehensive guide on maintenance that avoids paint removal altogether, you can discover more about how to clean diecast cars without ruining the paint for models that only need a light refresh.
The Paint Stripping Workflow
Regardless of the chemical used, the workflow remains consistent. First, ensure you are in a well-ventilated area, preferably outdoors. Apply the stripper generously to the diecast body with a disposable brush and place the model in a sealed, chemical-resistant container or a ziplock bag to keep the stripper from evaporating. After the recommended time, use a nylon brush, a plastic scraper, or even wooden craft sticks to gently scrub away the loosened paint. Never use a steel wire brush, as it will deeply scratch the soft Zamak alloy. Repeat the process if necessary and neutralize the body with soap and water once all paint is removed. This careful approach to one of the most critical diecast restoration tips will give you the perfect canvas for your new paint job.
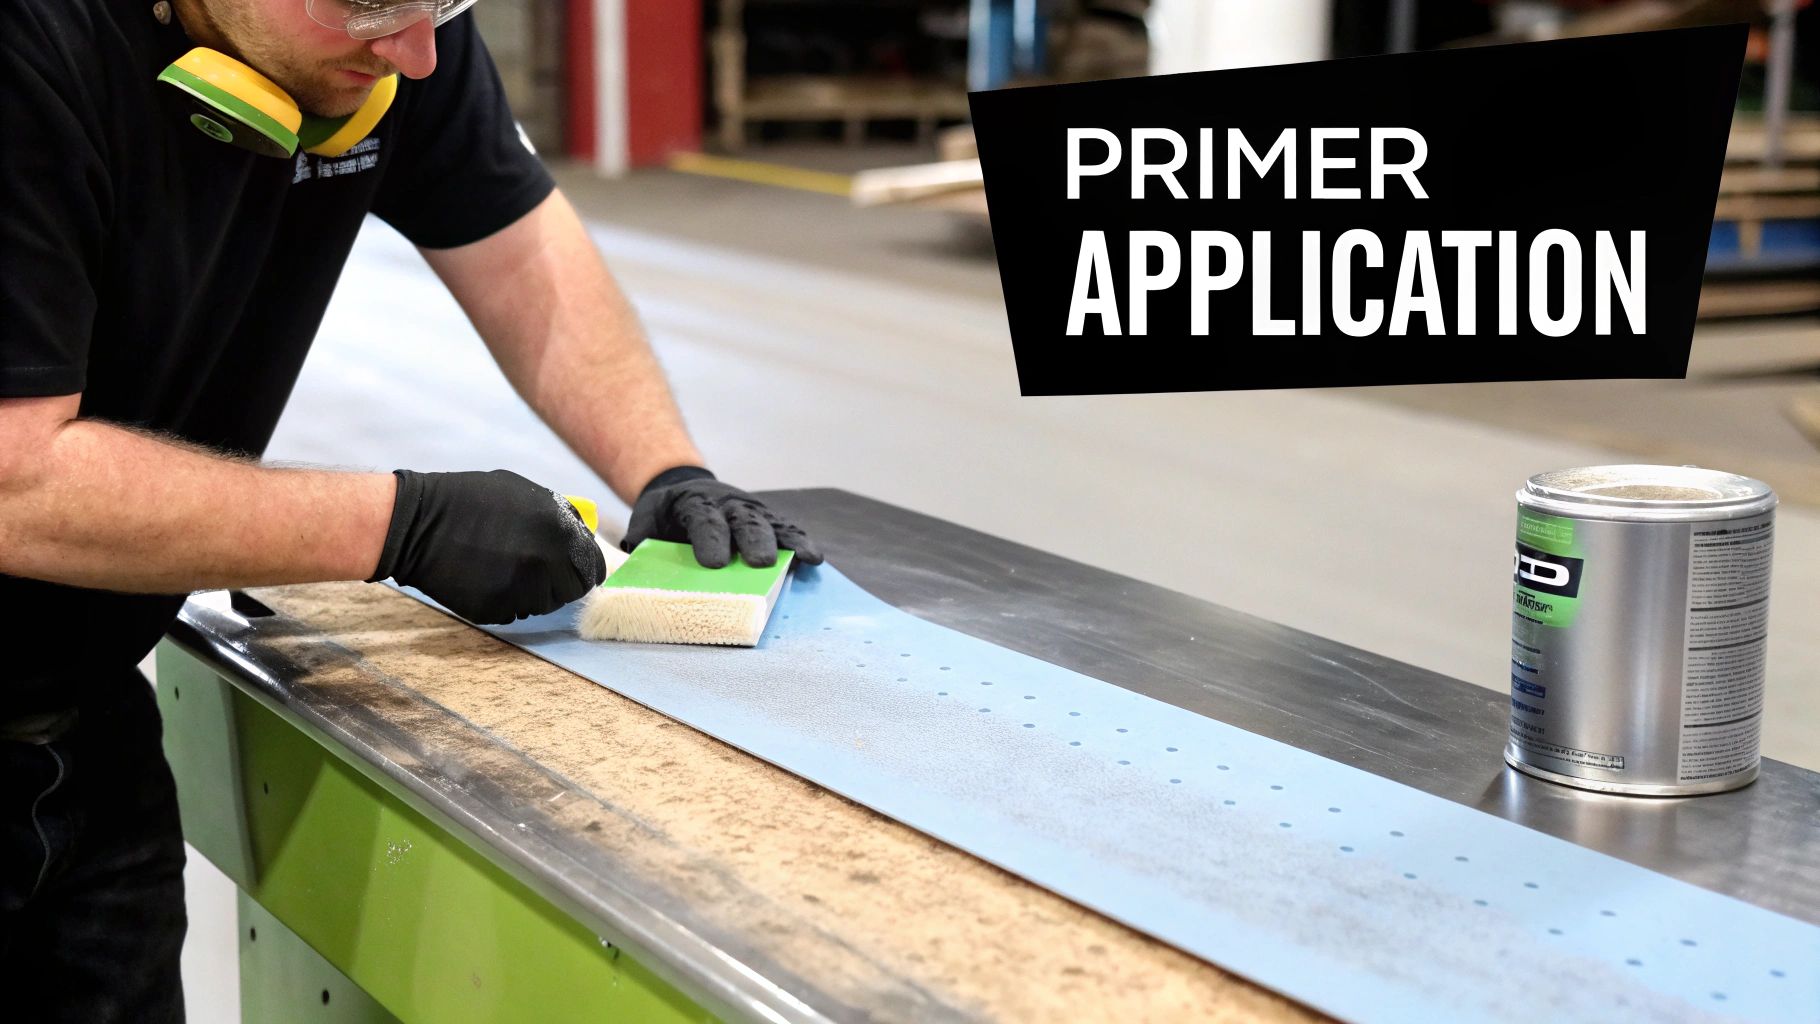
3. Metal Preparation and Primer Application
Once the old paint is stripped away, the true restoration work begins on the bare metal surface. This phase, metal preparation and primer application, is where the foundation for a flawless paint job is built. Skipping or rushing this crucial step is a common mistake that guarantees poor paint adhesion, leading to chips, peeling, and an unprofessional finish. Proper surface preparation ensures the new paint has a perfect surface to bond to, determining the durability and visual quality of the final restoration.
Achieving a Flawless Surface
The goal is to create a surface that is not only clean but also perfectly smooth and ready for primer. Even after chemical stripping, the Zamak casting may have imperfections like casting lines, corrosion pitting, or rough patches. Addressing these issues is non-negotiable for a professional outcome.
Your workflow for achieving this surface should be systematic:
- Initial Sanding: Start by smoothing out casting lines and any significant blemishes with a medium-grit sandpaper, such as 220 or 320 grit.
- Final Smoothing: Progress to a finer grit, like 400 or 600 grit, to create a uniform, smooth finish across the entire body. The surface should feel silky to the touch.
- Final Cleaning: Before applying primer, wipe the model down with isopropyl alcohol to remove any oils from your fingerprints, sanding dust, and residual contaminants. Use a tack cloth right before spraying for a final dust removal.
This meticulous process ensures that the primer and paint lay down flat, without magnifying any underlying imperfections.
The Critical Role of Primer
Primer serves two essential functions: it promotes adhesion between the metal and the color coat, and it fills in microscopic scratches for an even smoother final surface. The choice of primer is just as important as the technique used to apply it. For Zamak and other metal alloys, a self-etching primer is often the best choice. This type of primer contains a mild acid that microscopically etches the metal, creating a superior mechanical bond that regular primers cannot achieve.
When applying primer, remember that less is more. Apply it in several thin, even coats rather than one thick, heavy layer. Allow the specified curing time between each coat, typically 15-20 minutes. This technique prevents runs, sags, and drips, preserving the fine details of the casting. Getting this stage right is one of the most impactful diecast restoration tips for achieving a factory-fresh or better-than-factory finish.
4. Color Matching and Professional Painting Techniques
The single most defining characteristic of a restored diecast model is its finish. Achieving a factory-accurate or custom show-quality paint job requires more than just a can of spray paint; it demands a deep understanding of color matching, paint formulations, and professional application methods. This stage can make or break a restoration, transforming a stripped metal shell into a vibrant, authentic-looking collectible that honors its original glory.
Achieving an Authentic Finish
The first step in any professional paint job is research. For vintage models like Dinky Toys or Corgi, dedicated online forums and collector guides often list original factory colors or their modern equivalents. In some cases, restorers have created entire databases of paint chips and formulas to help others. For iconic lines like Hot Wheels Spectraflame, replicating the transparent, candy-like finish is a specialized art form in itself, often requiring specific transparent lacquers over a polished metal or silver base.
For a truly professional outcome, consider these key elements:
- Automotive Paint Systems: Many top-tier restorers use professional automotive paints, which offer superior durability, color accuracy, and a wide range of finishes. You can often find automotive paint codes that are a very close match to original diecast colors.
- Test Pieces First: Never apply your final color directly to the model. Always spray a test piece, like a spare metal spoon or a piece of scrap Zamak, to verify the color and finish under different lighting conditions. This is one of the most crucial diecast restoration tips to avoid a disappointing result.
- Airbrushing for Control: An airbrush provides far greater control over paint application than a spray can. It allows for ultra-thin, even coats, which are essential for preserving fine casting details like panel lines and emblems.
This methodical approach ensures the final color is not just close, but a faithful reproduction of the original. This infographic highlights the key considerations for achieving a professional paint job.
Following these steps for surface prep and application is what separates an amateur paint job from a concours-worthy finish.
Application Best Practices
The secret to a flawless paint job lies in patience and technique. Rushing the application will lead to runs, drips, and an uneven "orange peel" texture. The goal is to build up the color gradually with several light, misty coats rather than one thick, heavy coat. Maintain a consistent distance between your airbrush or spray nozzle and the model, typically 6-8 inches, and overlap each pass by about 50%. This ensures even coverage without creating thick spots.
Proper environmental control is also non-negotiable. Paint in a well-ventilated, dust-free area, and ideally, where the temperature and humidity are stable. Dust and debris are the enemies of a smooth finish. Allow adequate drying time between coats as specified by the paint manufacturer, and apply a quality clear coat to protect the color and provide the desired final sheen, whether it's matte, satin, or high gloss. For those looking to master the nuances of application, you can dive deeper into various model painting techniques to elevate your projects.
5. Detail Restoration and Tampo Recreation
The difference between a good restoration and a great one often lies in the smallest details. After the bodywork and paint are complete, focusing on detail restoration, including the recreation of factory graphics, is what brings a model back to its original glory. This precision work involves recreating tampo-printed logos, brand names, and stripes, as well as refinishing chrome and transparent parts to a factory-fresh standard. It is this final 10% of effort that truly elevates a project from a simple repaint to a professional-quality restoration.
Recreating Graphics and Fine Details
Restoring the original graphics, often applied at the factory via pad printing (tampo), requires a steady hand and the right materials. Simply leaving these details off can make even the best paint job look incomplete. For restorers looking for authentic diecast restoration tips, mastering this stage is non-negotiable.
Here are a few proven techniques for bringing details back to life:
- Waterslide Decals: Custom waterslide decals are the most popular method for recreating complex graphics. High-resolution photos or scans of an original model can be used to design and print new decals. For best results, always apply decals over a gloss clear coat, which provides a smooth surface for them to adhere to without "silvering," or showing air trapped underneath.
- Micro-Brushes and Paint Pens: For simple details like headlights, taillights, or grille surrounds, a fine-tipped micro-brush is invaluable. Chrome paint pens are also excellent for touching up small chrome details like door handles or window trim without the need for complex re-plating.
- Vinyl Plotters: Hot Wheels collectors specializing in Redlines often use craft vinyl plotters to perfectly replicate the iconic side stripes. This method creates crisp, clean lines that are difficult to achieve with paint alone.
This meticulous work ensures the model's character and authenticity are preserved. After applying any decals or painted details, it's crucial to seal them with another light layer of clear coat to protect them from handling and environmental factors.
Restoring Chrome and Transparent Parts
Beyond paint and decals, the "jewelry" of the model needs attention. Faded chrome and scratched windows can detract from an otherwise perfect restoration. For chrome parts, smaller pieces can be revived with chrome pens or specialized paints like Alclad II. For larger components or a truly authentic finish, many Dinky Toys or Corgi restorers send parts to professional plating shops for re-chroming.
Transparent parts, like windows, can often be saved. Minor scratches on plastic windows can be polished out using a series of fine-grit polishing compounds, starting coarse and working your way to a fine plastic polish. This careful attention to every component is what defines a top-tier restoration. While this guide focuses on factory-fresh finishes, you can also explore techniques to create realistic wear and age; you can learn more about weathering model cars to add another layer of realism to certain projects.
6. Protective Finishing and Long-term Preservation
The final coat of paint is not the end of the restoration; it is the beginning of the preservation stage. A professional finish is only as good as its protection. Applying a durable clear coat and implementing proper long-term care are crucial diecast restoration tips that separate a temporary fix from a lasting masterpiece. This final step shields your hard work from environmental damage, handling, and the simple passage of time, ensuring your restored model looks pristine for years.
Choosing and Applying a Clear Coat
The clear coat is your model's first line of defense. It seals the paint and decals, provides a consistent sheen (from matte to high gloss), and offers crucial protection against UV light, dust, and fingerprints. Selecting the right type is essential for achieving a professional and durable finish.
Consider these options for sealing your work:
- Automotive-Grade Clear Coats: For the ultimate in durability and a deep, wet-look shine, 2K (two-part) automotive clears are unmatched. They are highly resistant to chemicals and scratches but require a spray gun and proper safety equipment due to their toxicity.
- Hobby-Specific Lacquers and Enamels: Brands like Tamiya and Mr. Hobby offer high-quality clear coats in aerosol cans and jars for airbrushing. These are much more user-friendly and come in various finishes, making them perfect for most hobbyist projects.
- UV-Resistant Formulas: If the model will be displayed in a well-lit area, a UV-resistant clear coat is non-negotiable. It prevents the vibrant colors you painstakingly applied from fading over time.
Always apply the clear coat in thin, even layers in a dust-free environment. Rushing this step can introduce dust nibs or create runs, undoing your flawless paint job.
Long-Term Preservation Strategies
Once the clear coat has fully cured, your focus shifts to preservation. How you handle, store, and display the model will determine its longevity. High-end auction houses and museum conservation experts follow strict protocols that can be adapted for any home collection. For example, handling a restored piece with cotton gloves prevents oils from your skin from tarnishing the finish over time.
Proper storage is arguably the most critical element of preservation. Fluctuations in temperature and humidity can cause paint to crack, decals to peel, and even promote zinc pest in older Zamak models. A climate-controlled environment is ideal, but even a simple, enclosed display case in a stable part of your home can make a significant difference. For anyone serious about maintaining their collection's value and condition, it is vital to discover the best practices for diecast car storage to protect your investment.
Diecast Restoration Tips: 6-Step Comparison Guide
| Restoration Step | Implementation Complexity 🔄 | Resource Requirements ⚡ | Expected Outcomes 📊 | Ideal Use Cases 💡 | Key Advantages ⭐ |
|---|---|---|---|---|---|
| Proper Disassembly and Part Identification | Moderate - careful stepwise process | Basic tools: camera, screwdrivers, containers | Organized parts, targeted restoration approach | Initial restoration phase, complex multi-piece models | Prevents part loss, enables correct reassembly |
| Safe Paint Removal Without Damage | High - careful chemical handling | Specialized solvents, safety equipment | Clean surface, revealed original details | Paint stripping, color changes, customization | Preserves detail, removes old/amateur paint |
| Metal Preparation and Primer Application | Moderate to High - multi-step prep | Multiple products, dust-free environment | Strong paint adhesion, corrosion prevention | Surface prep before painting, corrosion-prone metals | Extends paint life, prevents corrosion |
| Color Matching and Professional Painting Techniques | High - skill and equipment needed | Airbrush, spray booth, color tools | Accurate color reproduction, professional finish | Final painting phase, historic restorations | Maintains accuracy, enables custom finishes |
| Detail Restoration and Tampo Recreation | Very High - specialized skills | Precision tools, custom decals, plating services | Factory-original appearance, restored small details | Fine detail restoration, tampo/decals recreation | Enhances authenticity and collector value |
| Protective Finishing and Long-term Preservation | Moderate - ongoing care required | Clear coats, storage materials | Long-term finish protection, fade prevention | Final restoration step, display and storage | Protects restoration, maintains finish quality |
Your Journey from Collector to Restorer
Embarking on the path of diecast restoration is a deeply rewarding endeavor, transforming you from a passive admirer of miniature automotive art into an active creator and preserver. Throughout this guide, we have journeyed through the critical stages of bringing a worn, forgotten model back to its former glory. Each tip provided is a building block in developing your skill set, designed to elevate your projects from simple repaints to stunning, shelf-worthy masterpieces.
We began with the foundational step of methodical disassembly, emphasizing the importance of documenting every screw, axle, and plastic insert. This careful approach prevents lost parts and ensures a smooth reassembly process. From there, we explored safe paint removal, moving beyond harsh chemicals to techniques that protect the delicate casting beneath, setting the stage for a flawless new finish. A perfect paint job is impossible without a perfect foundation, which is why metal preparation and proper primer application are non-negotiable for achieving that smooth, professional look and ensuring long-term durability.
From Paint to Preservation
The heart of any restoration lies in the finish. Our exploration of color matching and professional painting techniques provided the insights needed to replicate factory-correct shades or create unique custom liveries. We stressed the value of thin, even coats and the patience required to build up color gradually. But a great paint job is only part of the story.
The magic truly comes alive in the details. By learning to recreate intricate tampos and fine details, you breathe life and authenticity back into the model. Finally, we covered the crucial last step: applying a protective clear coat to seal your hard work, safeguarding it against handling, dust, and the effects of time. Mastering these diecast restoration tips is about more than just fixing old toys; it's about developing patience, precision, and an artist’s eye.
Key Takeaway: True restoration mastery is not achieved in a single project. It is the cumulative result of practice, experimentation, and learning from each model you revive. Every challenge, from a stubborn rivet to a tricky decal, is an opportunity to refine your technique.
Your next steps are clear: select a candidate for restoration, perhaps a common, low-value model from a flea market or one from your own collection that has seen better days. Apply these principles one by one, and don't be discouraged by initial setbacks. The skills you build will empower you to save rare models, create personalized gifts, and connect with automotive history on a tangible, hands-on level. You are now equipped with the knowledge to not just collect diecast cars, but to give them a second life.
Ready to find the perfect candidate for your next project or add a pristine model to your collection? Explore the incredible selection at Everything Diecast. Whether you need a common model to practice these diecast restoration tips on or a rare gem to cherish, their vast inventory is the ideal starting point for every collector and restorer.