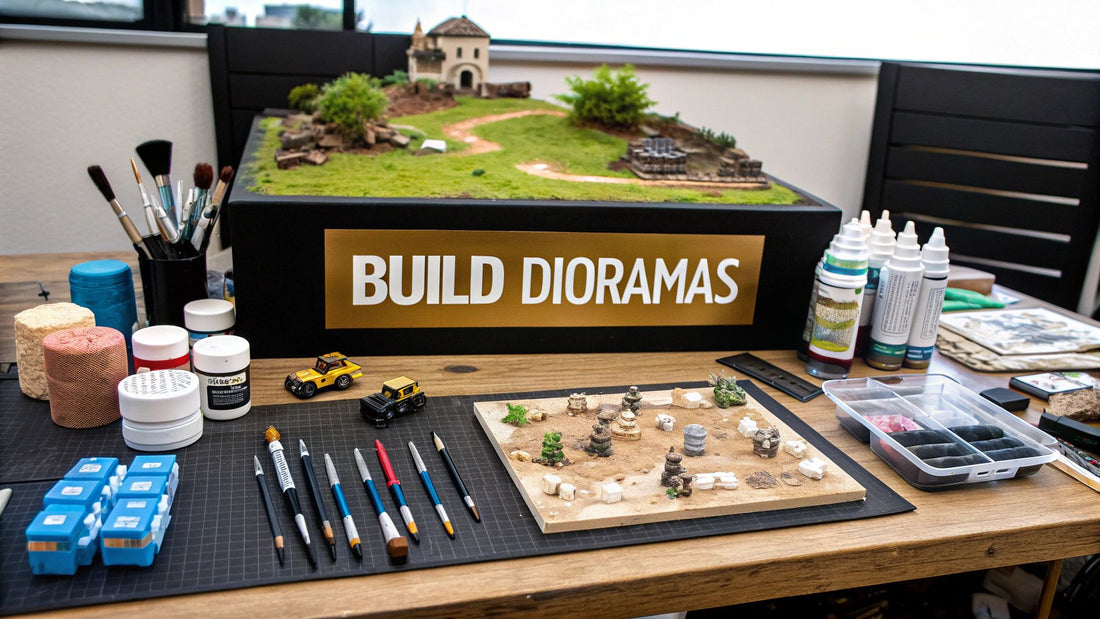
How to Build Dioramas A Guide to Miniature Worlds
Building a diorama is really about telling a story in miniature. You're taking a static model and giving it a world to live in, a moment frozen in time. The whole process is a fantastic blend of planning, hands-on construction, and artistic finishing touches. You'll start with a core idea, hunt down the right materials, and then piece by piece, bring your scene to life.
Your First Step Into Miniature World-Building
Welcome to the incredibly rewarding hobby of creating miniature worlds. This guide is here to walk you through exactly how to build a diorama, taking you beyond just assembling a kit and into the realm of true storytelling. It's an art form that mixes creativity with practical skill, but don't let that intimidate you. The most breathtaking scenes I've ever seen were often born from simple ideas and a lot of patience, not necessarily from years of technical training.
To get a feel for where you're headed, it helps to know where this all started. The term "diorama" actually came about in the early 19th century. Back then, they were huge theatrical displays using painted backdrops and clever lighting to create immersive scenes. That concept eventually scaled down into the three-dimensional models we know and love today, used to capture everything from historical battles to serene natural habitats.
The Core Stages of Creation
The journey from a blank base to a finished diorama can be broken down into a few key stages. It doesn't matter if you're building a gritty, post-apocalyptic cityscape or a quiet forest scene with a classic pickup truck—the basic process holds true.
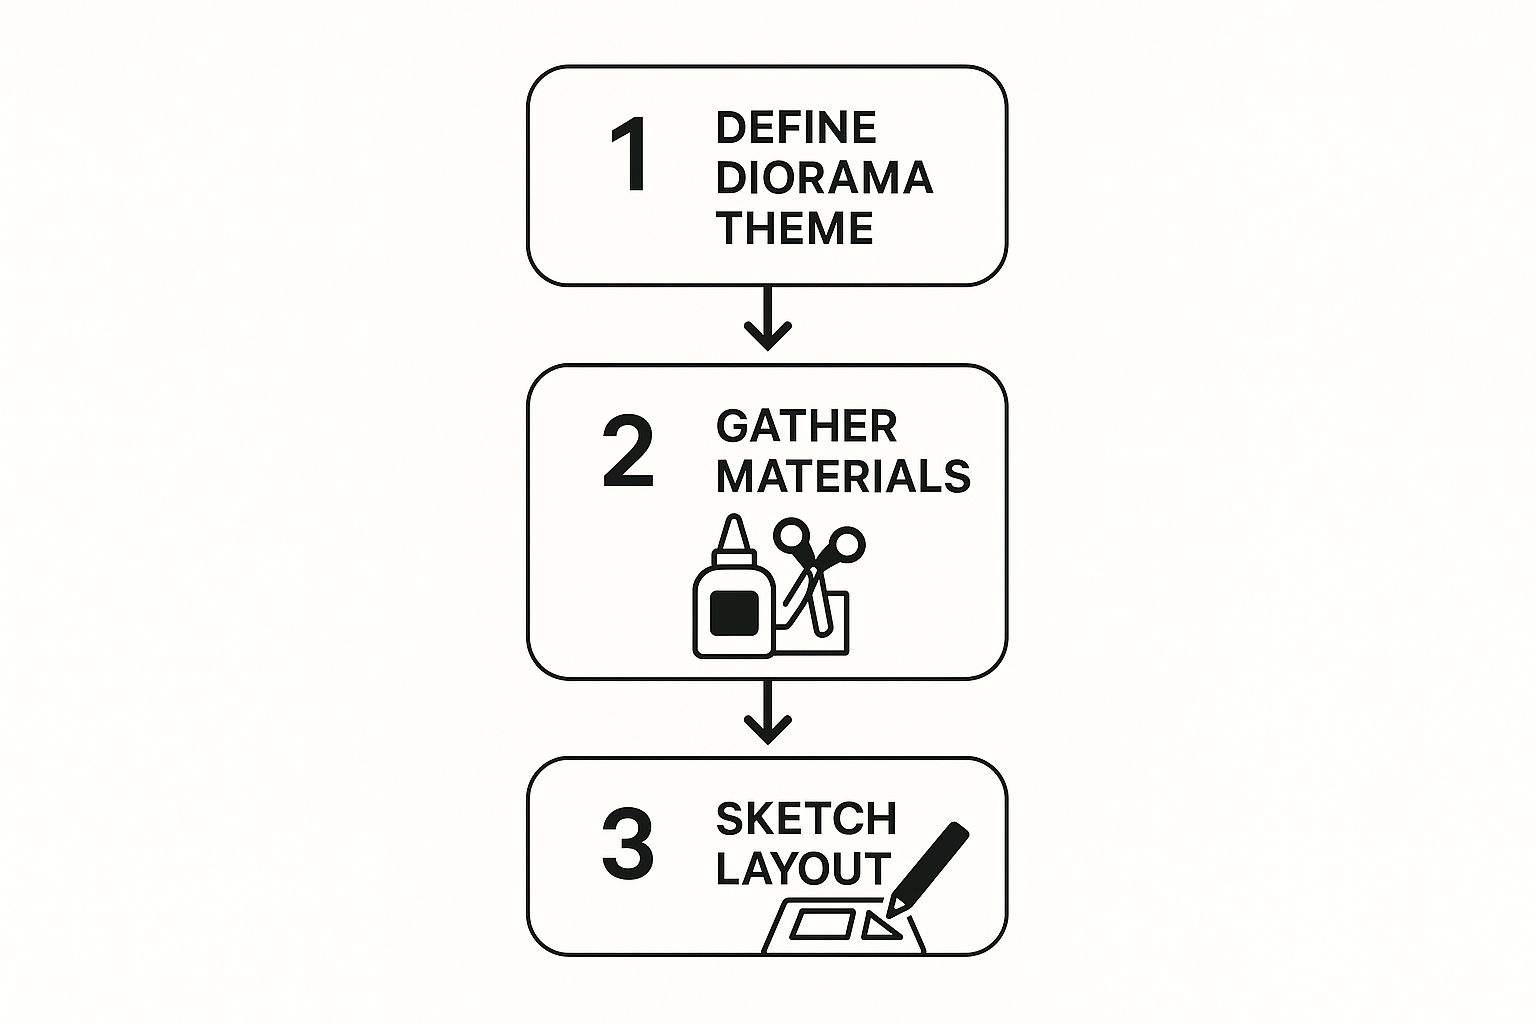
As you can see, a solid foundation is laid long before you ever pick up glue or paint. Figuring out your theme, gathering your tools, and sketching a rough layout are the critical first moves. Getting this right from the start saves a ton of headaches later on.
To give you a clearer roadmap for your entire project, let's look at the core stages from start to finish.
This table breaks down the entire process into manageable phases.
Core Stages of Building a Diorama
| Stage | Key Objective | Essential Tasks |
|---|---|---|
| Planning | To create a clear vision and story for your scene. | Brainstorming themes, choosing a scale, and sketching the layout. |
| Construction | To build the physical foundation and landscape. | Creating the base, shaping terrain with foam, and adding structures. |
| Detailing | To add realism and bring the scene to life. | Painting, weathering, adding figures, and placing small props. |
Each phase builds on the last, ensuring a logical and less overwhelming workflow.
By focusing on one stage at a time, you make the entire process much more manageable. Think of it like building a house: you lay the foundation before you put up the walls, and you paint the walls before you hang the pictures. This structured approach is the secret to a successful project.
Developing Your Diorama's Concept and Story
 Every truly memorable diorama starts not with glue or paint, but with a single, compelling idea. This is the creative groundwork—the phase where you decide what story you’re trying to tell. A powerful concept acts as the anchor for every choice you’ll make down the line, from the terrain you build to the tiniest details you add.
Your concept doesn't have to be some complex battle scene with dozens of figures. Honestly, some of the most effective dioramas I’ve ever seen capture a simple, quiet moment: a weathered old pickup truck parked by a forgotten gas station, or a lone figure surveying a vast, alien landscape. The real key is to pick a theme that actually excites you.
Choosing Your Theme and Narrative
First, think about the story you want to bring to life. Are you aiming for something full of action and drama, or a scene that's more atmospheric and serene? A great way to get the ball rolling is by asking a simple question: "What if?"
What if a classic muscle car broke down on a deserted highway at dusk? Just like that, you have a time, a place, and a narrative to work with.
For instance, you could display a Cylon Raider from Battlestar Galactica on a simple stand. But what if it had crashed or been captured, and colonial crew members were inspecting it inside a hangar bay? That transforms it from a static model into a moment with a story, sparking real curiosity in anyone who sees it.
Your diorama's story is told through visual cues. The placement of a figure, the angle of a vehicle, and the weathering on a wall all work together. A strong concept ensures these details are cohesive and purposeful, not just random additions.
The Critical Decision of Scale
Once you’ve got a theme, your next crucial decision is scale. This choice impacts everything—from the availability of models and accessories to the final physical size of your piece. Common scales like 1:35 and 1:72 for military models, or 1:24 for cars, offer a huge range of kits and figures to choose from.
Here’s a quick breakdown of some popular scales:
- 1:18 Scale: Perfect for showing off highly detailed diecast cars. Its larger size is ideal for scenes focused on one or two vehicles where every little detail is paramount.
- 1:35 Scale: This is a military modeling staple. It offers a fantastic balance of detail and manageable size, with an enormous variety of figures, vehicles, and aftermarket accessories available.
- 1:72 Scale: Best for larger scenes, like aerial dioramas or sprawling battlefields. You can fit more into a smaller space, but the models will naturally have less intricate detail.
I personally use 1:35 for most of my ground-level scenes. It’s big enough to work on comfortably but small enough that the environment doesn't take over my entire workshop.
Sketching and Composition
You don't need to be a professional artist to plan your layout. In this phase, simple sketches are your best friend. Grab a piece of paper, draw a rough outline of your diorama base, and start placing your main elements. A great tip is to think about creating a dynamic composition by avoiding perfectly straight lines and symmetry.
One of the most effective compositional tools is the "visual triangle." By placing key elements—like a vehicle, a building, and a group of figures—in a triangular arrangement, you naturally guide the viewer's eye through the scene. It creates a much more engaging and balanced look than just lining things up.
These early sketches are invaluable. They help you troubleshoot problems before you’ve even started building, ensuring the diorama you create is the one you envisioned from the start.
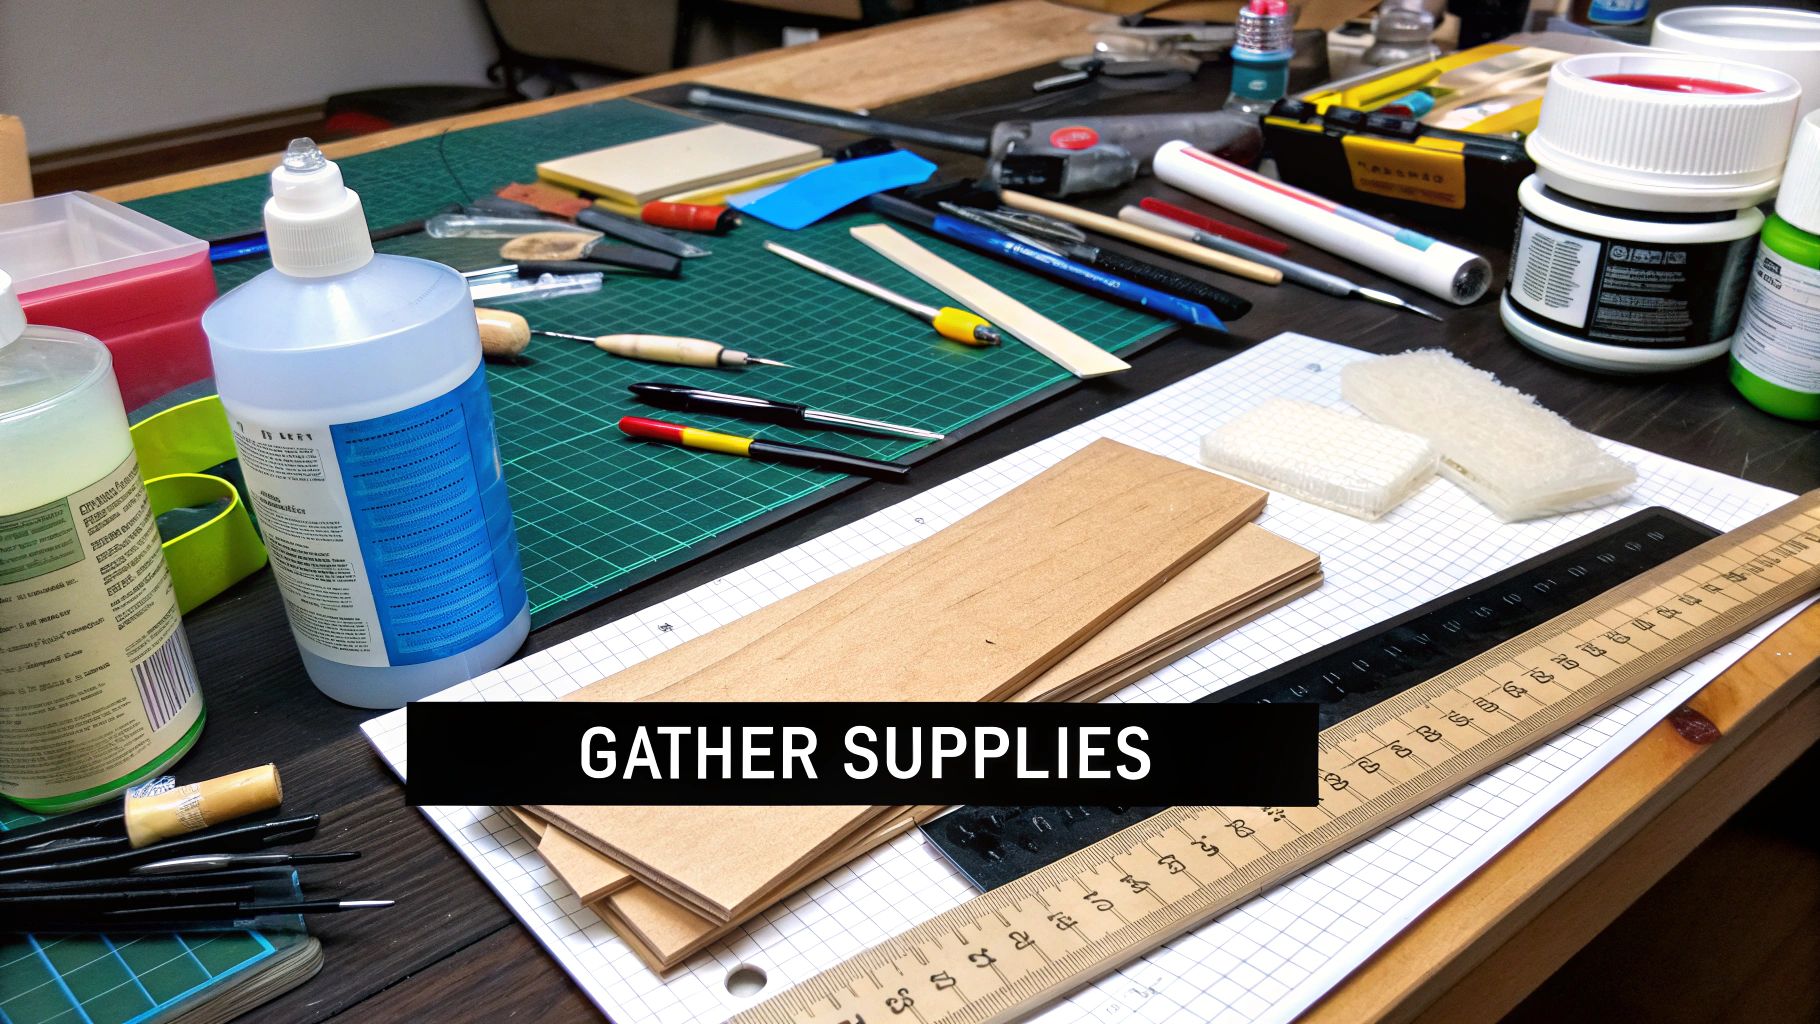
Assembling Your Diorama Toolkit
Now that you have a solid concept brewing, it's time to gather the tools that will bring your miniature world to life. Forget the idea that you need a professional-grade workshop. Honestly, a hand-picked selection of basic supplies is more than enough to get started on some seriously incredible dioramas.
The aim here is to build a versatile kit without blowing your budget on specialized gear you might not even touch for your first few projects. Think of it as your foundational set of tools—the ones you'll rely on again and again.
The Core Non-Negotiables
Before we even think about terrain and textures, let's talk about the absolute must-haves. These are the tools you'll reach for on every single build, so it pays to invest in decent quality right from the start.
- A Self-Healing Cutting Mat: This is non-negotiable. It's going to save your work surface from disaster and keep your blades from getting dull so quickly. A good mat gives you a safe, reliable place to make your cuts.
- A Quality Craft Knife: An X-Acto knife or a similar scalpel-style tool is essential. Make sure you have plenty of sharp, replaceable blades on hand for making those clean, precise cuts in foam, plastic, and balsa wood.
- An Arsenal of Adhesives: You'll quickly learn that one type of glue just doesn't cut it. I always keep PVA (basic white glue), a reliable super glue (cyanoacrylate), and a hot glue gun within arm's reach. Each has its own job, from general assembly to creating quick, rock-solid bonds.
With just these three items, you have the bedrock of your toolkit. You’d be surprised how much you can accomplish with just these fundamentals.
Building Your Material Library
With your core tools sorted, you can start gathering the fun stuff—the materials for creating realistic bases and landscapes. This is where your creativity really gets to run wild, and you'll discover that many of the best materials are either cheap or can be repurposed from things you already have around the house.
For instance, XPS insulation foam—that pink or blue stuff from the hardware store—is the undisputed king for carving hills, cliffs, and structural bases. It’s lightweight, a dream to shape with your craft knife, and it holds detail beautifully. If you're planning something like a construction site scene with detailed diecast construction vehicles, XPS foam is perfect for creating that rough, excavated ground.
Pro Tip: Whatever you do, don’t throw away your foam scraps! Those small offcuts are perfect for making individual rocks, piles of rubble, and other small details. A "scrap box" is one of the most valuable assets a diorama builder can have.
On top of foam, a small tub of plaster or even basic wall spackling is fantastic for texturing the ground or smoothing over the seams between foam pieces. And for that final touch of life, a few different colors of "flock" (finely ground foam) and some static grass will instantly add a dose of realism to any scene. You can find all of this at most hobby shops.
Fortunately for us, the growing interest in creative hobbies means these materials are easier to find than ever. In fact, the global arts and crafts market saw projected steady growth from 2017 to 2024, with a compound annual growth rate of about 5.5%. This boom gives hobbyists like us amazing access to an ever-expanding range of supplies.
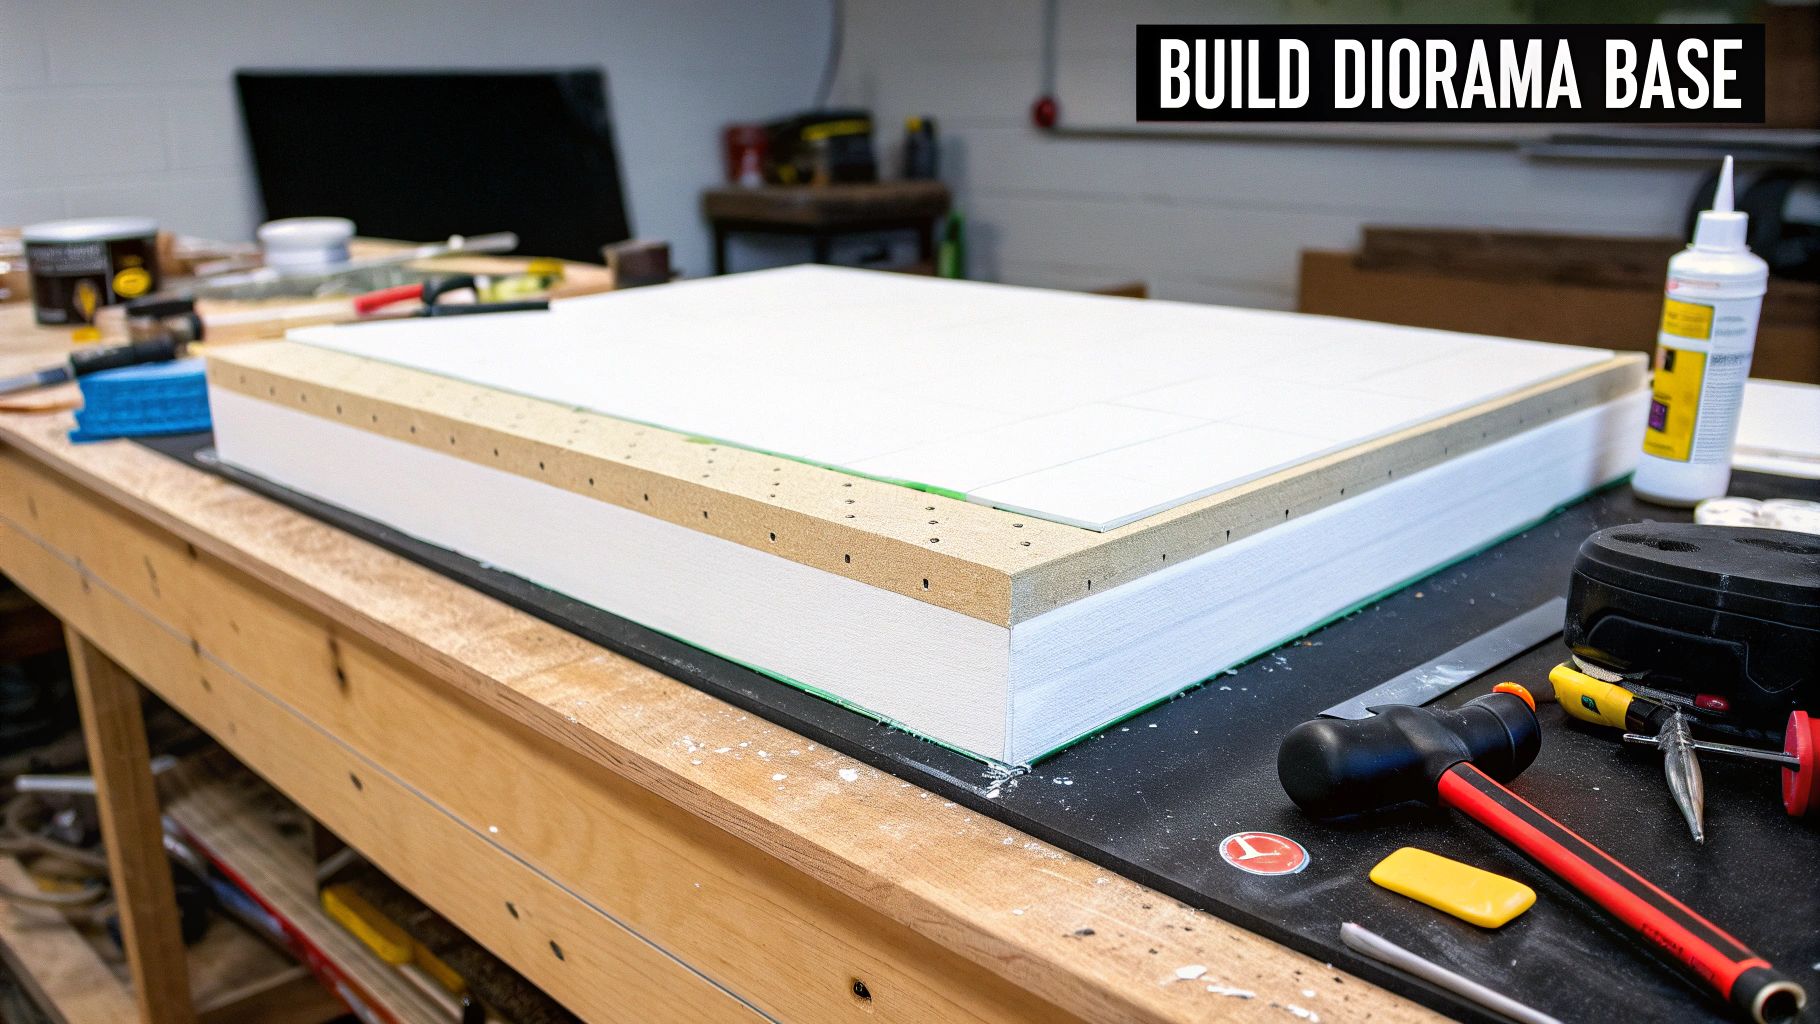
Building Your Base and Shaping the Terrain
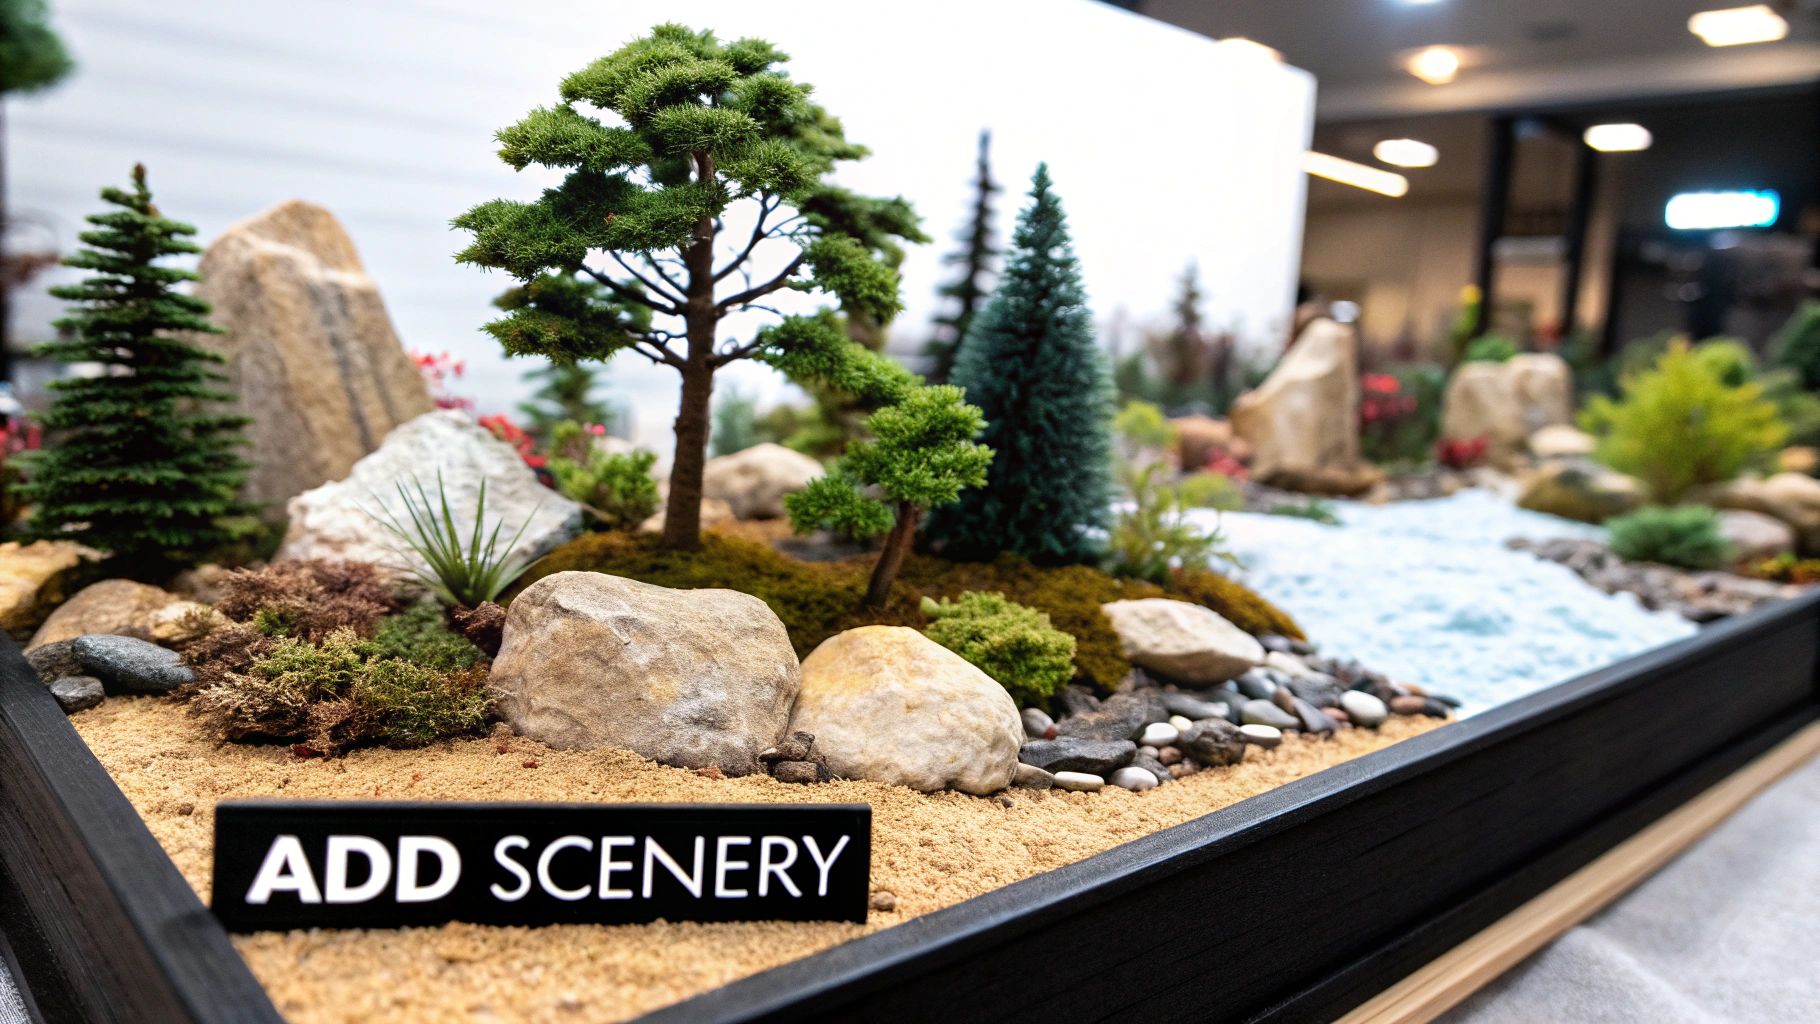
Alright, this is where the magic really starts to happen. You've got your sketches, you've gathered your supplies, and now it's time to turn those ideas into a three-dimensional world. Your base is the literal foundation of your diorama, and getting it right is crucial. A good, solid base prevents warping down the road and gives you a stable platform for all the cool details you'll be adding later.
You've got two main choices for a base: a piece of wood (like MDF or plywood) or a sheet of extruded polystyrene (XPS) insulation foam. Wood gives you a rigid, heavy foundation, which is fantastic for larger, more complex scenes. But for most projects, XPS foam is my personal go-to. It's incredibly light and a dream to carve, which means you can build your terrain right into the base itself.
Choosing Your Core Terrain Material
When you're ready to build up the landscape, different materials will give you very different results. The right choice really comes down to the environment you're trying to create. I’ve put together a quick comparison to help you decide.
Common Terrain Materials Compared
Here's a look at some of the most popular options for creating terrain, with a breakdown of what they're good for and their pros and cons.
| Material | Best For | Pros | Cons |
|---|---|---|---|
| XPS Insulation Foam | Hills, cliffs, basic structures | Lightweight, easy to carve, holds shape well | Can be messy to cut, requires specific glues |
| Plaster Cloth | Hard shells, rocky surfaces | Strong, drapes over forms, great texture | Can be brittle, requires a base structure |
| Sculptamold/Clay | Small-scale sculpting, ground cover | Highly versatile, easily textured | Can shrink or crack, longer drying times |
For most of my natural landscapes, I find myself starting with XPS foam. By stacking and gluing layers together, you can quickly and easily block out the basic elevations for hills, valleys, and dramatic cliffsides.
Carving and Shaping Your Landscape
Once your foam layers are glued down tight, the real fun begins. Grab a hot wire cutter or a long craft knife and start carving away, following the rough contours you drew in your plan. Don't stress about making it perfect right away; the goal here is to just get the main forms of your terrain established.
Think of yourself as a sculptor, slowly revealing the landscape that's hidden inside that foam block. For instance, maybe you're building a scenic overlook for a classic Ford diecast car. You'll want to carve out a nice flat spot for the car to sit, with the ground sloping gently away from it. If you need some inspiration, you can find a great selection of classic Ford diecast cars to find the perfect vehicle for your scene.
After I have the big shapes defined, I'll often use a rasp or some coarse sandpaper to knock down the hard edges and create more natural, flowing lines.
Don’t just think in horizontal layers. Create interest by carving into the terrain to form gullies, riverbeds, or recessed areas. These features add a crucial sense of depth and realism to your scene, making the environment feel much more dynamic.
The final step in this stage is to add a thin layer of plaster or wall spackling over the foam. This does two things: it creates a hard, protective shell over the soft foam, and it gives you a perfect, slightly porous surface for paint and other textures like dirt and static grass. This hard shell unifies the whole landscape, hides any seams, and gets it ready for the fine details that will truly bring it to life.
Painting, Weathering, and Adding Final Details
This is my favorite part of any build. It's the stage where a static, lifeless model truly transforms into a compelling, believable moment captured in time. A great paint job and thoughtful weathering can elevate a simple construction into a piece of art. You’re not just painting plastic and wood; you’re adding history, wear, and a story that makes the scene feel authentic.
Everything starts with a solid base coat of paint. Once that foundational color is down and fully cured, the real fun begins with techniques like washes and dry brushing.
A wash is just thinned-down paint, usually a black or dark brown. When you apply it, it naturally flows into all the tiny recessed areas and crevices of your model and terrain. This simple trick creates instant depth and realistic shadows with minimal effort.
On the other hand, dry brushing does the opposite. For this, you’ll want an old, stiff brush. Get a tiny bit of a lighter-colored paint on it, then wipe almost all of it off on a paper towel until the brush seems dry. Now, lightly flick the brush over the raised surfaces of your model. This technique catches all the high points and edges, creating incredible highlights that perfectly simulate how light would naturally hit the object.
Creating Convincing Weathering Effects
Weathering is what sells the story you're trying to tell. An abandoned vehicle isn't just sitting there; it's rusting away. A soldier hunkered down in a trench isn't pristine; their boots are caked with mud. These are the details that make or break a diorama.
Here are a few of my go-to methods for common effects:
- Rust on Metal: I start by painting a dark brown base color on the areas I want to look rusted. Then, I take a small piece of sponge, dip it in brighter orange and reddish-brown paints, and stipple on random patches. This creates a much more organic and realistic texture than just painting it on with a brush.
- Mud and Dirt: You can create a fantastic mud texture by mixing fine sand, PVA glue, and brown acrylic paint into a paste. I'll smear this onto vehicle tires, the boots on my figures, and the groundwork itself to create a cohesive, muddy look. For ideas on how factory models handle off-road wear, check out our collection of rugged Jeep diecast vehicles.
- Dust and Grime: Pigment powders are an absolute game-changer here. These are super-fine colored powders that you can brush onto surfaces to simulate accumulated dust. A light dusting of earthy tones on a vehicle or building instantly makes it feel like it belongs in the environment.
The real secret to great weathering is subtlety and using real-world references. Always look at photos. Notice how rust actually forms in streaks, how dust settles on flat surfaces, and how mud splatters upwards. It’s always better to start with a light touch—you can always add more, but it’s a real headache to take it away.
Placing Figures and Final Props
With your scene painted and weathered, it’s time for the final touches: placing your figures and props. This is where your diorama's narrative snaps into focus. A figure's pose, the direction they're looking, and their placement relative to other elements—all of these guide the viewer's eye and tell the story without a single word.
Even the smallest props can add immense character. An old oil drum, a discarded crate, or a forgotten tool can transform a generic scene into a specific, lived-in space. As you place these final elements, always ask yourself how they contribute to the story you wanted to create from the beginning.
This is also a great opportunity to find some unique figures to really add personality. The market for detailed miniatures has exploded, reflecting a much broader interest in collecting. Valued at about USD 10.5 billion in 2023, the action figure and statue market is projected to reach approximately USD 16.3 billion by 2032. This growth means there's a huge variety of characters out there to bring your diorama to life. You can find more details in the full action figures and statues market report.
Got Questions About Building Dioramas?
When you’re first learning how to build dioramas, you’re going to have questions. It’s totally normal. Getting some of these common concerns out of the way right from the start can save you a ton of frustration and give you the confidence to dive into your first real project.
It's easy to feel a bit swamped by all the choices, especially when you're trying to figure out the right scale or how to get a specific effect just right. Let’s clear up a few of the big ones so you can get to the fun part—building.
What Is the Best Scale for a Beginner Diorama?
If you're just getting your feet wet, I almost always recommend starting with either 1:35 or 1:48 scale. Honestly, these scales hit the sweet spot between size and detail. The models and figures are big enough that you can actually handle and paint them without needing a magnifying glass, but they aren't so large that they feel intimidating.
What’s more, the sheer volume of kits and accessories available in these scales is incredible. A quick search for 1:35 military models or even iconic movie cars will give you thousands of ways to get started. For instance, if you're a movie buff, finding vehicles to build a scene around is a piece of cake. This collection of Fast and Furious diecast vehicles is a perfect example and works great for this kind of project.
How Can I Make Realistic Water Effects on a Budget?
You absolutely do not need to drop a lot of cash on expensive two-part resins to get believable water effects. One of my favorite budget-friendly tricks is to use multiple thin layers of clear gloss varnish or even Mod Podge over a well-painted base. It's surprisingly effective.
Here’s how you can create a simple pond or puddle:
- Start by painting the “bottom” of your water feature. Use shades of brown, green, and even a little black to create the illusion of depth.
- Once that’s dry, apply a thin, even coat of your gloss varnish and let it cure completely. Don't rush this part.
- Keep repeating this process for 5-10 layers. The layers will build on each other, creating a fantastic, deep, watery look.
Want to add a little movement? You can gently stipple the surface of the final wet layer with a soft brush to create subtle, convincing ripples.
If there's one thing I see new builders struggle with, it's rushing the process. The top three mistakes are almost always poor planning, an unnatural layout, and overdoing the weathering. Always sketch out your idea first. Arrange your pieces in asymmetrical or triangular patterns to create a more dynamic feel, and remember that weathering should be built up slowly. Subtlety is your best friend.
At Everything Diecast, we have the high-quality models you need to bring any scene to life. Explore our huge collection and find the perfect centerpiece for your next diorama at https://everythingdiecast.net.