How to Build a Diorama Base That Tells a Story
Every great diorama starts from the ground up. Before you even think about placing your prized diecast model, you need a solid foundation—not just a platform, but the very world your scene will inhabit. Getting this part right is the secret to a display that tells a compelling story.
This initial planning stage is where you solve problems before they even start. It’s where a simple sketch can transform a good idea into a great one, ensuring your final piece feels balanced, intentional, and truly brings your model to life.
Planning Your Diorama Foundation
So, where do you begin? The first major decision is choosing the right material for your base. This choice affects everything that follows, from the stability of your scene to how easy it is to work with and transport.
Choosing the Right Material for Your Base
I've seen countless projects, and the base material is often the unsung hero. You need something sturdy that won't warp or bend under the weight of plaster, resin, or your models. For this reason, a staggering 85% of experienced builders I know start with a plywood or MDF board.
These boards typically range from a small 12 x 12 inches for a simple vignette to a more ambitious 24 x 36 inches for a sprawling scene. Just remember, doubling the size can increase your prep time and material costs by around 50%, so plan accordingly.
While wood is a classic, you have a few excellent options:
- Medium-Density Fiberboard (MDF): This is my personal go-to for permanent displays. It’s heavy, super stable, and has a smooth surface that’s a dream to paint on. No warping, no fuss.
- Plywood: A bit lighter than MDF, plywood still offers fantastic strength. If you go this route, spend a little extra on a high-grade sheet to avoid dealing with splinters or an uneven finish.
- Picture Frames: Looking for a clever shortcut for a small scene? An old picture frame is a fantastic solution. It gives you a defined, pre-finished border that instantly makes your diorama look more professional.
Once you have your wooden foundation, it's time to build up the terrain. This is where you really start shaping your world.
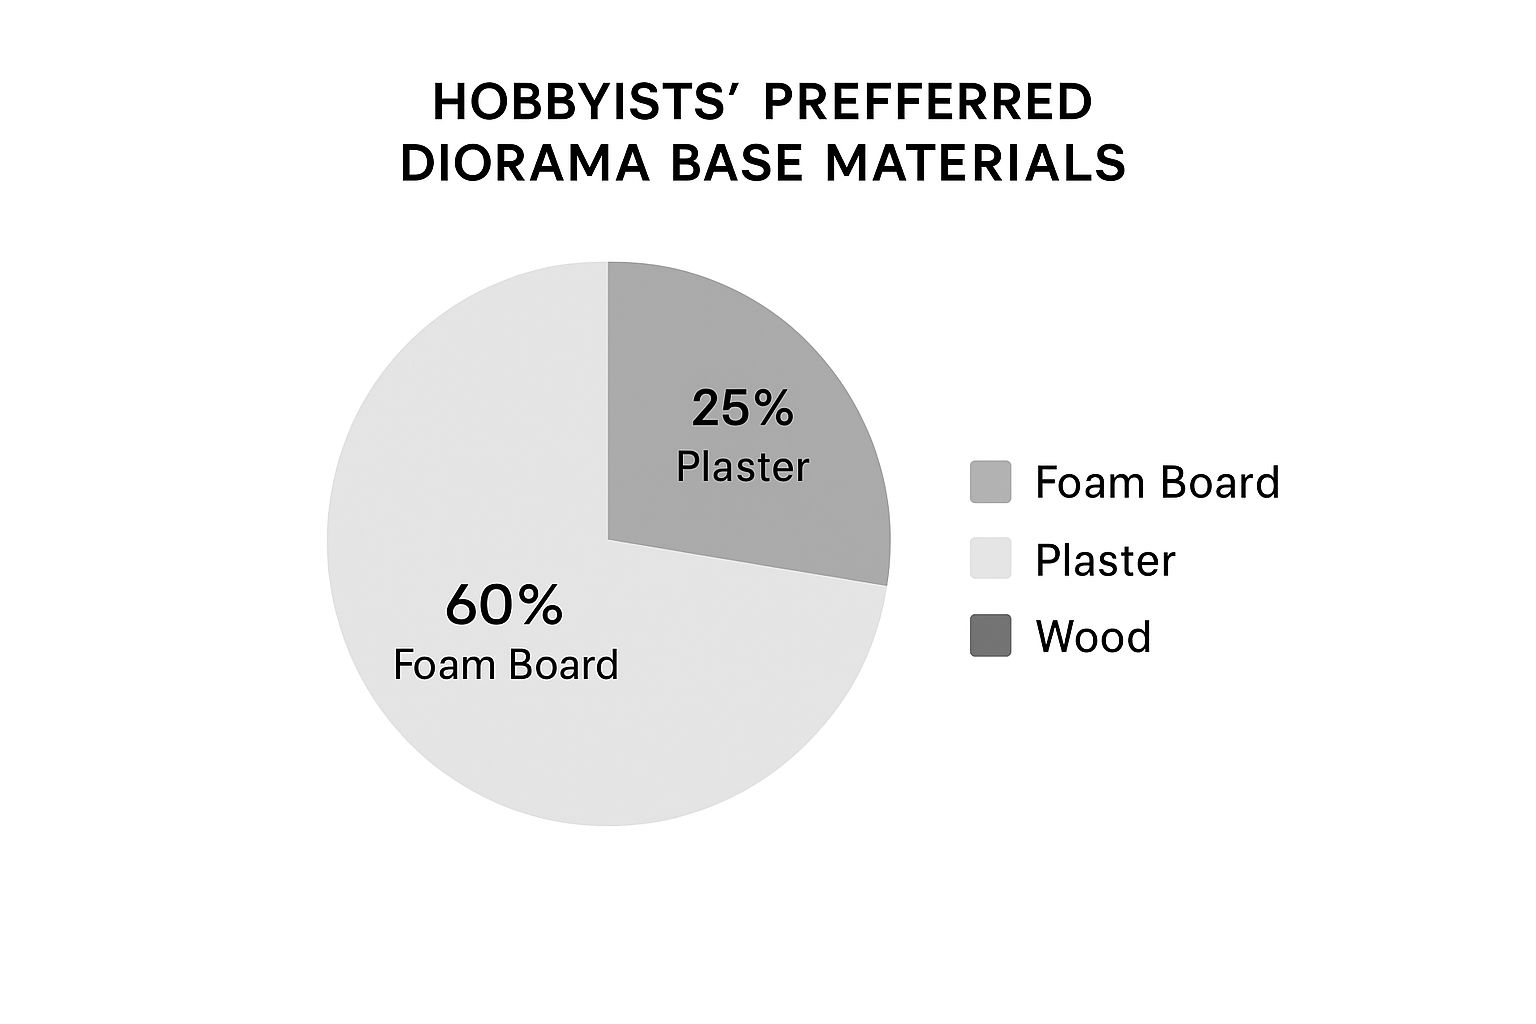
As you can see, foam is the runaway favorite for creating textures and elevation. It's lightweight, cheap, and incredibly easy to carve, making it perfect for hills, rocks, and road surfaces.
To help you decide on the right foundation, here's a quick breakdown of the most common materials.
Choosing Your Foundation Material
This table offers a quick comparison of common base materials to help you choose the best option for your project's scale and budget.
| Material | Pros | Cons | Best For |
|---|---|---|---|
| MDF | Very stable, smooth surface, warp-resistant, easy to paint | Heavy, can be difficult to cut without proper tools | Permanent displays, larger scenes, projects requiring stability |
| Plywood | Strong, durable, lighter than MDF | Can splinter, surface may need sanding | All-purpose dioramas, scenes that may be moved |
| Extruded Foam (XPS) | Lightweight, easy to carve and shape, great for terrain | Can be fragile, requires a solid base underneath | Creating elevation, landscapes, and custom terrain |
| Picture Frame | Provides a finished edge, great for small scenes, readily available | Limited by standard sizes, may not be very deep | Small vignettes, single-car displays, quick projects |
Ultimately, the best material depends on what you're building. For most of my projects, I use an MDF board with layers of foam on top to get the best of both worlds: stability and easy-to-shape terrain.
Sketching Your Layout and Flow
With your base material ready, it's time to bring out a pencil and start mapping out your vision. Don't stress about making it a perfect piece of art. This is a rough blueprint. The goal is to figure out where everything will go.
Pro Tip: Always place your hero—the diecast model—first. Every other element, from a tree to a lamppost, should exist to draw the eye toward it and enhance its story. Ask yourself: What's the focal point here? How do I want someone's eye to move across the scene?
Think about creating a sense of natural movement. A road with a slight curve is almost always more interesting than one that's perfectly straight. If you're building a landscape, use gentle slopes and varied heights to create depth and guide the viewer's gaze.
Mark out the footprints for buildings, trees, and, of course, your model. This simple step is your best defense against a cluttered or unbalanced scene. For more ideas on how to compose a scene, our general guide on how to build dioramas has some great tips and techniques.
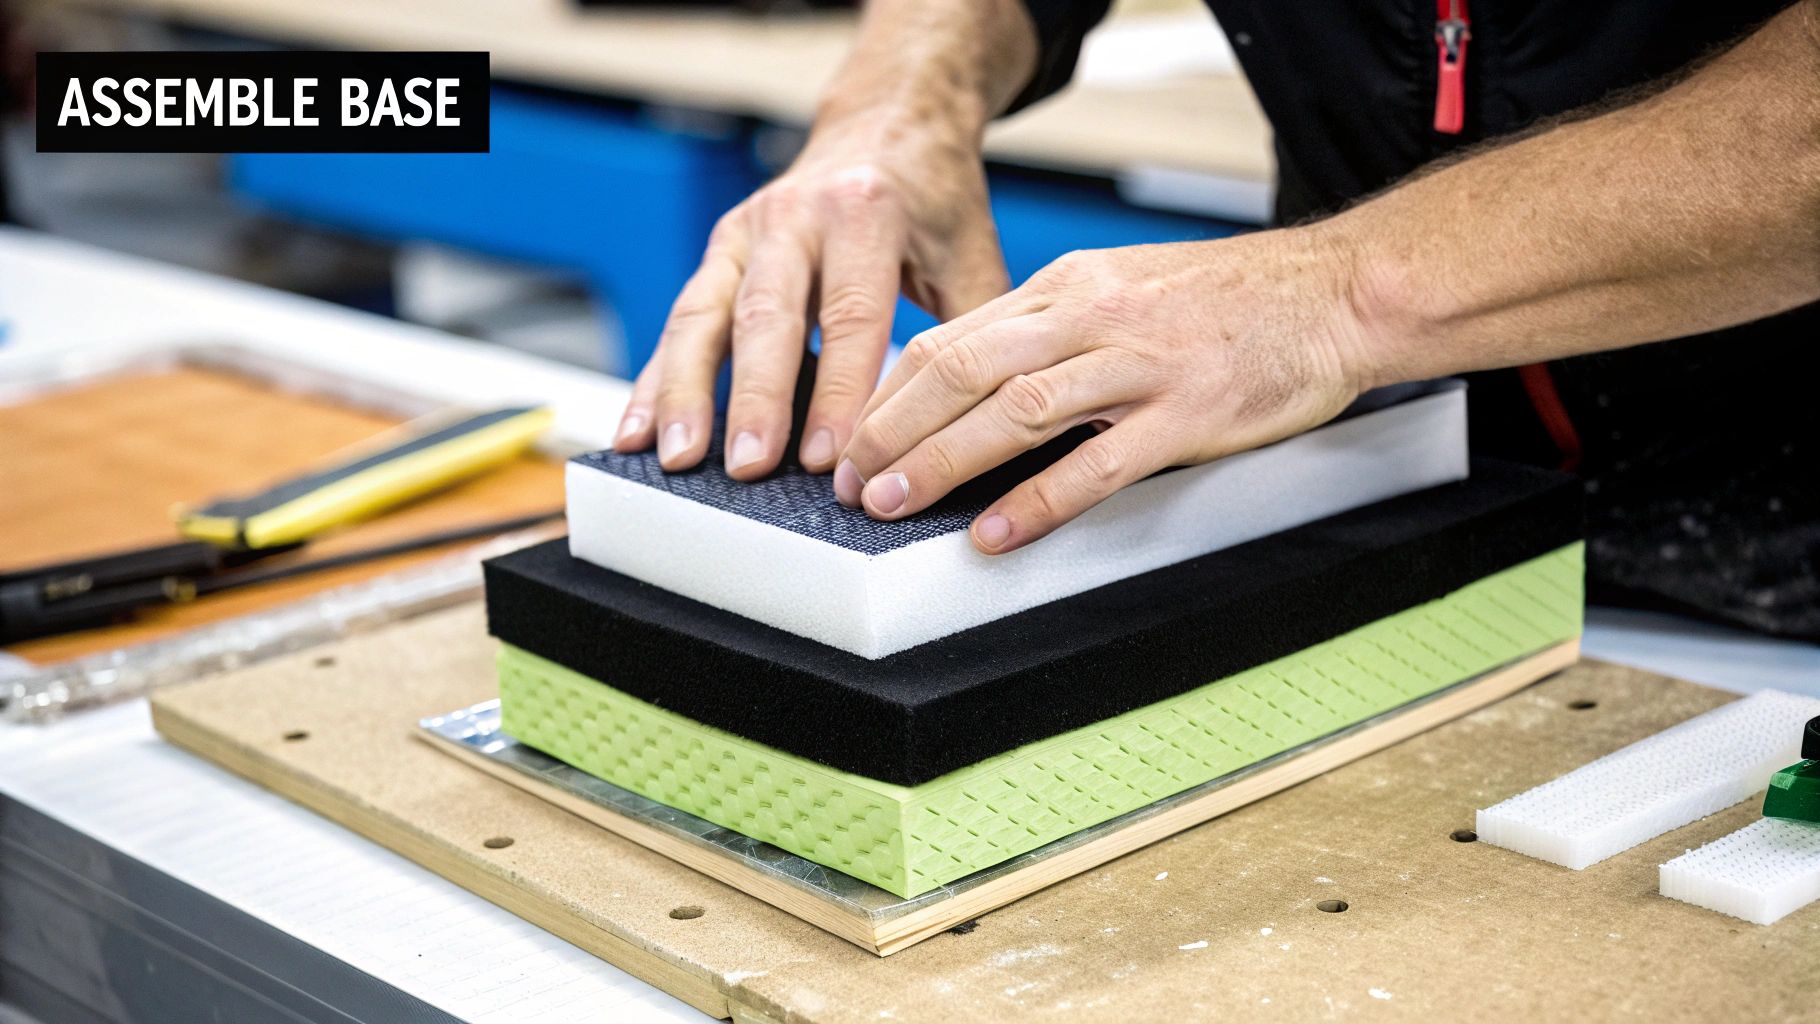
Shaping Your Landscape with Foam and Filler
Now that your base is solid, the real fun begins. It's time to stop looking at a flat board and start seeing a miniature world. This is where you get to play sculptor, turning that blank canvas into terrain with hills, valleys, and roads. Our go-to material for this magic trick is extruded polystyrene (XPS) foam—you’ve probably seen it as pink or blue insulation boards at the hardware store.
There’s a good reason why this stuff is so popular. A 2020 survey of scale modelers showed that over 65% lean on XPS foam for building up their landscapes, and I’m firmly in that camp. It's incredibly easy to shape but still dense and durable. You can carve it precisely without it crumbling into a million tiny beads like that cheap white styrofoam. XPS foam comes in various thicknesses, usually from 1 to 4 inches, which makes it perfect for stacking and layering to create everything from gentle slopes to steep mountainsides. If you're curious about the materials driving modern modeling and construction, you can dive into the full industry research here.
Carving Your Basic Terrain
To get started, you don't need a massive toolkit. Your best friends for shaping XPS foam will be a sharp craft knife (like an X-Acto) and, if you have one, a hot wire cutter. I use the craft knife for making big cuts and slicing layers to size, but the hot wire cutter is where the artistry happens. It glides through the foam by melting it, letting you create smooth, natural curves with virtually zero dust.
A quick word of caution: if you're using a hot wire cutter, make sure you're in a well-ventilated space. The fumes aren't great to breathe in. I always pop on a pair of safety glasses, too, because tiny bits of hot, melted foam can sometimes flick off unexpectedly. For more aggressive shaping, like creating weathered rock faces or knocking down high spots, a Surform rasp or even just a piece of coarse-grit sandpaper works like a charm.
First, glue your foam layers down with a foam-safe adhesive and let it cure. Then, just start carving. Don't worry about getting it perfect on the first pass. The goal here is to establish the major shapes—the hills, the dips, and the flat areas where you plan to put a road or a building.
Creating a Durable Hard Shell
Foam is amazing for creating shapes, but it’s far too soft to be the final surface. It dents at the slightest touch and won't hold the fine textures we'll be adding later. The solution is to give it a protective hard shell. This is usually done with plaster or a filler, which not only protects the foam underneath but also gives you a perfect surface for texturing and painting.
My Personal Tip: For most of my small to medium dioramas, I skip the mess of mixing plaster. Instead, I go straight for pre-mixed lightweight spackling or wood filler. It’s less likely to crack, it dries much faster, and you can even sculpt details right into it while it’s setting.
Using a palette knife or even an old plastic gift card, spread a thin, even coat of your filler over all the exposed foam. This is your opportunity to really refine the landscape.
- Blend Seams: Work the filler into the joints where your foam layers meet, making those lines completely vanish.
- Fill Gaps: Use it to create a seamless transition from your foam terrain to the wooden edge of the base.
- Sculpt Details: As the filler starts to get a bit stiff, you can get creative. Use a sculpting tool or the back of your craft knife to scribe in details like cracked earth, striations on a rock face, or even press in tire ruts.
Now, you have to be patient. Let the hard shell cure completely. Depending on the product and how thick you applied it, this could take a few hours or a full day. Once it’s rock-solid, a light sanding will knock down any rough spots, and your base will finally be ready for the next stage: adding texture and bringing it to life with paint.
Applying Realistic Textures and Color
Once your landscape is sculpted and hardened, it's no longer just a flat board—it's a piece of sculpture. But now comes the real magic, the part that breathes life into it. Texture and color are what will transform that solid shape into a believable world, whether you're building a muddy rally stage or a sun-baked desert road.
A flat coat of brown paint just looks like… well, brown paint. Real ground has depth, variation, and grit. The best way to capture that is by making your own texture paste. It’s far simpler than you might think and gives you total control over the final look.
My go-to recipe is a simple mix of PVA glue (your standard white or wood glue works great), a little bit of water to get the right consistency, and your chosen texture medium. Fine sand, tile grout, or even a bit of real, sterilized dirt can be mixed in to create an impressive, gritty paste.
Crafting Custom Ground Textures
For a convincing basic earth effect, I often mix PVA glue, a splash of brown acrylic craft paint, and fine sand until it reaches a thick, spreadable consistency. Smear this over your base with an old brush or a palette knife, and you've instantly created a realistic, gritty surface.
While that texture paste is still wet, you have a golden opportunity to add some storytelling. This is the perfect moment to gently press your diecast model’s tires into the muck to create believable tracks. You can also use a sculpting tool to carve in some tiny footprints or drag a stiff brush through it to simulate erosion patterns.
A classic rookie mistake is waiting for the painting stage to add color. By mixing acrylic paint directly into your texture paste, you create a colored base. This is a lifesaver because if your surface ever gets chipped down the road, you won't see a glaring white patch of plaster underneath.
After you've applied it, this texture layer needs to dry completely. This can take up to 24 hours, so be patient. Trying to paint over a wet base will just create a muddy mess and undo all your hard work.
Sometimes, you need more than just "dirt." Different scenes call for different ground types. Creating your own texture mixes is easy and saves you from buying expensive pre-made products.
Here are a few simple recipes you can whip up with common craft supplies.
DIY Ground Texture Recipes
| Terrain Type | Ingredients | Mixing Ratio | Application Tip |
|---|---|---|---|
| Muddy Earth | PVA Glue, Brown/Black Paint, Fine Sand, Coffee Grounds | 2 parts glue, 1 part paint, 1 part sand/grounds | Add a gloss varnish after it dries for a "wet mud" look. |
| Cracked Desert | PVA Glue, Water, Fine Sand, Crackle Medium | 1 part glue, 1 part sand, apply over crackle base | Apply the paste over a dried layer of crackle medium for realistic cracks. |
| Gravel Road | PVA Glue, Gray Paint, Coarse Sand, Small Pebbles | 2 parts glue, 1 part paint, 2 parts sand/pebbles | Press small pebbles or ballast into the wet paste for extra texture. |
| Snowy Ground | PVA Glue, White Paint, Baking Soda, Microbeads | 3 parts glue, 1 part paint, 2 parts baking soda | Sprinkle extra baking soda on top while wet for a powdery finish. |
Experimenting with these is half the fun. You can adjust the ratios to get the exact consistency you're looking for.
Layering Color for Depth and Realism
Once your texture is rock-solid, the first step is always primer. A quick coat of matte black or dark brown spray primer does two things: it gives the next layers of paint something to grab onto, and it automatically pre-shades all the deep nooks and crannies, adding instant depth.
From here on out, the secret is to build up your color in thin layers. A single, thick coat of paint will look flat and toy-like. Instead, you want to use techniques that bring out all that texture you worked so hard to create. If you're new to these methods, we've got a complete guide covering various model painting techniques that will seriously elevate your skills.
Start with a base coat of your main earth tone, painted right over the primer. Don't stress about making it perfect. The real transformation happens next.
- Washes: A wash is just super-thin, dark paint—think black or dark brown heavily watered down. You slop this on generously, and it naturally flows into all the recessed areas, darkening them and beefing up the shadows.
- Dry Brushing: This is the complete opposite of a wash. Get a flat brush, dip the tips in a lighter color (like a tan or light gray), and then wipe almost all of the paint off on a paper towel. Gently drag the nearly-dry brush over the surface. The paint will only catch on the raised details, making them pop.
This one-two punch of dark washes and light dry brushing is what creates that incredible realism, turning your simple base into a truly convincing piece of terrain for your model.
Adding Lifelike Foliage and Weathering
Alright, the core structure is built and you’ve laid down your base colors, but the scene still feels a bit... sterile. Now comes the fun part. The final touches—the foliage and weathering—are what breathe life into your diorama and sell the illusion of a real, lived-in world. This is what separates a good diorama from a truly great one.
These finishing elements are more important than you might think. On most of my scenic builds, foliage and ground cover make up a massive 60% of what you actually see. The go-to materials for most hobbyists are static grass (about 40%), flocking powders (35%), and premade bushes or trees (25%). By layering these, you can create an incredibly rich and convincing environment that looks like it was pulled straight from reality.
Applying Natural Static Grass
Static grass is your secret weapon for creating realistic fields, lawns, and grassy verges. It's made of tiny synthetic fibers that, when zapped with a static grass applicator, stand straight up in the glue. The effect is uncanny—it looks just like real blades of grass.
To get started, just brush a layer of diluted PVA glue onto the area you want to cover. I like to dab the glue on unevenly to create a more natural, patchy look. Then, load up your applicator with grass fibers, hold it over the glued section, and let it rip. The fibers will jump down and embed themselves vertically, creating that perfect grassy texture.
Pro-Tip: My biggest piece of advice here is to never use just one color or length of static grass. Real fields are a messy mix of green, brown, and yellow grasses of different heights. I always layer at least two or three different types, like a base of 2mm spring green with patches of 4mm autumn-toned grass on top. It instantly makes the scene look a thousand times more authentic.
Once the glue is fully cured, you can gently vacuum up the loose fibers. Don't throw them out! You can save them in a jar for your next project.
Creating Bushes and Ground Cover
While static grass is fantastic for lawns, you’ll need a few other tricks up your sleeve for bushes, weeds, and those little mossy patches that add so much character. This is where clump foliage and fine turf "flock" powders come into play.
- Clump Foliage: This stuff is perfect for creating small bushes and the tangled undergrowth you see at the base of trees. Just tear off little pieces, put a dab of thick super glue or PVA on the bottom, and press them right into place on your diorama. To build up a larger bush, you can simply glue a few small clumps together.
- Fine Turf (Flock): This is a very fine, powdery foam material. It’s ideal for simulating low-lying ground cover like moss or patches of short weeds. I sprinkle it sparingly around the bases of rocks, along the cracked edges of a road, or in any spot that should look a little damp. It adds a wonderful extra layer of texture.
Weathering Your World
Realism isn't just about what's growing; it's also about decay, wear, and tear. Weathering is the process of adding all that good stuff—dirt, dust, rust, and stains—to make your scene look like it has a history and has been exposed to the elements.
Weathering powders are brilliant for this. They're just finely pigmented powders you can brush onto surfaces to create dusty roads or a buildup of grime in corners. A light tan powder brushed over a blacktop road instantly makes it look sun-bleached and driven on.
For things like oil stains or wet patches, I turn to a dark brown or black "wash," which is just heavily thinned paint. A few carefully placed drops on a garage floor or in a parking spot can add an incredible amount of story to your scene. If you really want to dive deep into this, be sure to check out our detailed guide on weathering model cars. The same techniques are essential for making both your vehicle and its environment feel connected and authentic.
Why Diorama Building Is a Global Passion
When you first decide you want to learn how to build a diorama base, you might think you're just starting a simple craft project. But what you're really doing is tapping into a massive, creative, and incredibly passionate global community. This hobby is all about storytelling, precision, and artistry, and it has millions of people hooked worldwide.
A huge reason for this boom is social media. Platforms like Instagram, Pinterest, and countless dedicated forums have become virtual clubhouses where builders of every skill level can connect. It’s where you’ll find breathtaking work-in-progress shots, trade secret techniques, and get that spark of inspiration for your next build.
The Rise of a Connected Community
This digital connection has completely changed the game, turning what was once a pretty solitary craft into a shared experience. Stuck on a technique? Need some honest feedback? Encouragement is now just a post away. You’re not building in isolation anymore; you’re part of a global network.
All this exposure and shared knowledge is making a real-world impact. The market for diorama and model-building supplies rocketed to an incredible USD 2.1 billion in 2023. And it's not slowing down—forecasts predict another 8-10% annual growth through 2030, a trend largely fueled by these thriving online communities.
Technology Pushing Creative Boundaries
It’s not just about sharing, either. New technologies are adding some seriously exciting dimensions to the hobby. The accessibility of 3D printing, for example, has been a game-changer. It gives builders the power to create hyper-specific, custom parts that were once impossible to find or painstakingly difficult to make by hand.
Need a tiny, historically accurate fire hydrant for a 1950s street scene? Or maybe a unique roof rack for your favorite diecast car? Now you can just design and print it yourself.
This blend of traditional, hands-on crafting with modern tech is what keeps the hobby so fresh and dynamic. It allows for a level of personalization and detail that constantly pushes the boundaries of what a miniature scene can be.
This growing ecosystem of tools, resources, and fellow creators makes right now an incredible time to get involved. Whether you're displaying a single prized vehicle or an entire fleet, understanding this global context connects you with a ton of invaluable support. It's a community that can truly enrich your own building journey and help you take your skills to the next level. For those focused on the cars themselves, our guide on how to collect diecast cars can offer even more inspiration for your display projects.
Common Questions About Building Diorama Bases
As you start transforming a blank board into a lifelike scene, you’re bound to hit a few snags. It happens to everyone. Whether you're a seasoned pro or just figuring out how to build a diorama base for the first time, these little issues can be frustrating. Let’s tackle some of the most frequent challenges modelers run into with some straightforward, experience-based answers.
What Is the Best Glue for Securing Foam and Textures?
Choosing the right adhesive is one of those small details that makes a huge difference. You don't want your masterpiece literally falling apart. When you're laminating foam layers or attaching foam to a wood foundation, a heavy-duty construction adhesive like Liquid Nails is a fantastic, reliable choice. You can also find dedicated foam-safe glues at any good hobby shop.
The main thing to remember is to avoid glues with harsh solvents. Things like certain super glues or contact cements will chemically melt right through your foam, creating a gooey mess.
For all the fine-detail work—think sand, static grass, and flocking—the classic solution is still the best: a simple mix of PVA glue (like your standard white school glue or wood glue) and water. I find a 50/50 ratio thinned with water is perfect. It creates a mixture that flows into every little crevice and dries crystal clear and incredibly strong, locking everything down permanently.
How Can I Stop My Diorama Base from Warping?
Warping is the arch-nemesis of the diorama builder. It’s almost always caused by moisture—from glue or wet plaster—soaking into just one side of a thin base. As that side dries and shrinks, it pulls on the material, and suddenly your perfectly flat base looks more like a potato chip.
The best defense here is a good offense. Start with a solid, stable foundation. I swear by 3/4-inch MDF or plywood because it's highly resistant to this kind of bending. If you have to use a thinner material, the secret is to equalize the tension. Before you add any terrain, just paint or seal both the top and bottom surfaces of your base. This simple step seals the wood and dramatically cuts down the risk of warping.
How Do I Create Realistic Water Effects?
Getting water to look believable is an art form, but it's a multi-step process that anyone can master. First, you need to paint the riverbed or pond area. Don't be shy with dark, moody colors—think dark greens, murky browns, and even black to create the illusion of real depth.
Next, you'll pour in a two-part clear epoxy resin. You can find products made specifically for dioramas that self-level beautifully, creating a perfectly flat, glass-like surface.
Expert Insight: Want to add some movement, like ripples or small waves? Wait until the resin has fully cured. Then, brush on a thin layer of a clear acrylic gel medium, like Mod Podge, and use a stiff brush to stipple the surface. It’s a great trick for creating that realistic, textured water effect.
Can I Use Real Dirt and Twigs from Outside?
Absolutely! Using natural materials can add a level of realism that’s hard to replicate. But—and this is a big but—you have to prep them correctly. Bringing in stuff from the outdoors can introduce unwanted guests like tiny insects or mold spores into your meticulously built scene.
To prevent a future infestation, you have to sterilize everything first.
- Bake any dirt, sand, and small rocks in an oven at a low temperature. I've found 200°F (95°C) for about 30 minutes does the trick.
- For twigs and branches, make sure they are completely dry, then seal them with a matte varnish. This stops them from rotting over time and keeps them stable.
A little bit of prep work ensures your creation stays pristine and pest-free for years to come. For a deeper dive into the hobby, you can also explore our beginner's guide to collecting diecast.
Ready to display your next masterpiece? At Everything Diecast, we have the perfect models to bring your newly built diorama base to life. Explore our collection of high-quality diecast vehicles today at https://everythingdiecast.net.